
Travel · 5 min
Travel Recovery Stretches
Unwind after a long flight, drive or train journey with moves for the ankles, back, neck and hips after hours of sitting. About five minutes.
Do this routine in the Prep app
Get Travel Recovery as a guided, timed session — with every move demonstrated and adjustable to how you feel.
Download on iOS
 1
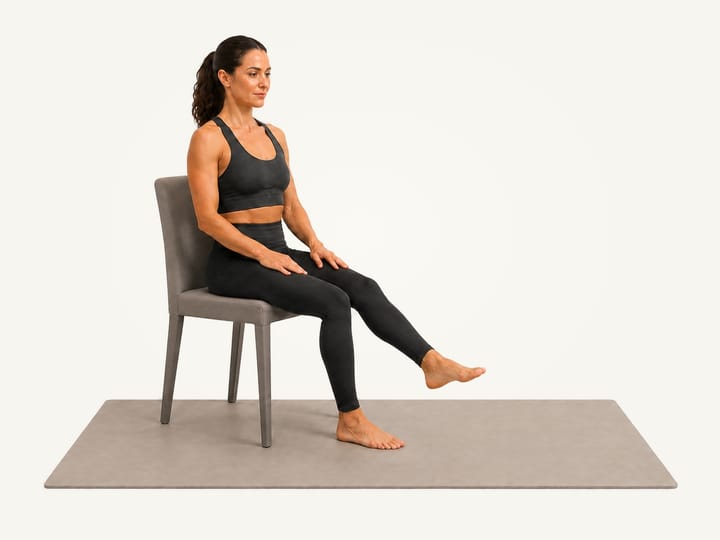
1Ankle Circles
45sLift one foot and circle the ankle in both directions.
How to do it
- Sit upright on a stable chair with both feet flat on the floor. Rest your hands on your thighs and keep your shoulders relaxed.
- Lift your left foot clear of the floor with the leg comfortably extended. Keep the shin still and slowly draw circles with your toes through a comfortable range. Change direction after a few circles.
- At the halfway cue, lower your left foot and lift your right. Circle the right ankle in both directions for the remaining time, keeping the movement smooth and comfortable.
Why it matters
Explore ankle movement in several directions without loading the foot.
How it should feel
Small, smooth movement around the ankle while the lower leg stays quiet.
Make it easier or harder
- EasierSit down. Support the leg and make a smaller circle.
 2
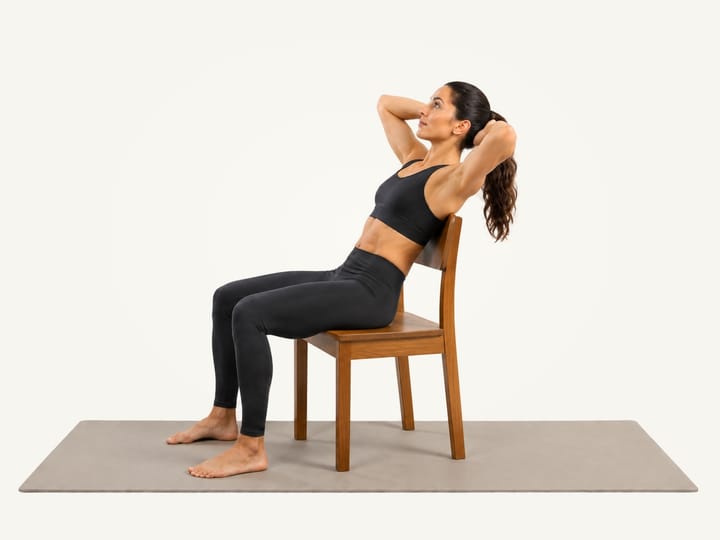
2Seated Thoracic Extension
30sSupport your head and gently extend your upper back over a firm chair back.
How to do it
- Sit on a sturdy chair with a firm back and no wheels. Keep both feet flat, knees comfortably bent and your hips supported on the seat. Choose a chair back that supports your mid-back.
- Sit tall and place both hands behind your head, with elbows comfortably open. Let your hands support your head without pulling it. Keep your feet and pelvis steady.
- Slowly lean your upper back over the chair back within a comfortable range. Keep your head supported and avoid forcing your neck or lower back. Breathe comfortably, then return upright with control before repeating.
Why it matters
Explore a supported backward bend through your middle and upper back.
How it should feel
A comfortable stretch around the mid or upper back while your feet and pelvis stay supported.
Make it easier or harder
- EasierUse a smaller lean. Cross your arms if holding the head is uncomfortable.
When to stop
Stop if this causes back or neck pain.
 3
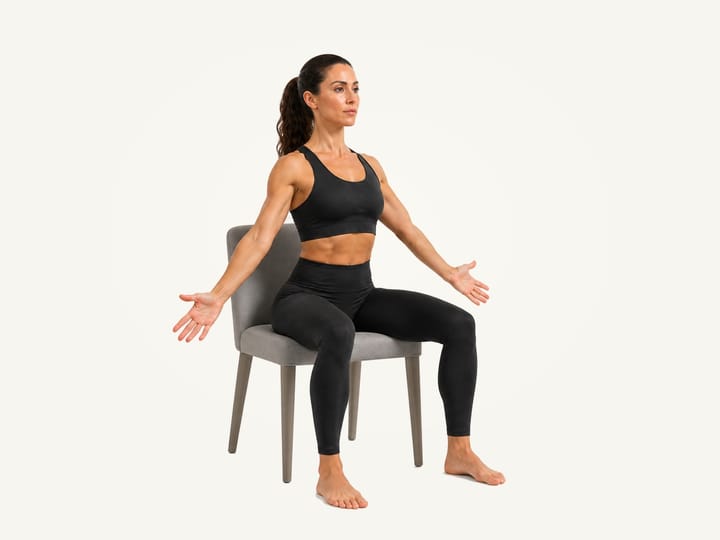
3Brugger Relief
30sSit forward, palms out, squeeze the shoulder blades together.
How to do it
- Sit near the front of a stable chair with both feet flat and comfortably apart. Rest your hands on your thighs, lengthen your spine and keep your gaze level.
- Turn your palms forward and open your arms low beside you. Gently draw the shoulder blades down and together, keeping your chin slightly tucked. Breathe easily during a brief, comfortable hold.
- Let your arms relax beside the chair with palms facing inward. Keep both feet grounded, then repeat the opening and release when ready.
Why it matters
Change your seated position with a gentle arm opening and release.
How it should feel
A comfortable opening across the chest and light work through the upper back.
Make it easier or harder
- EasierSit with support. Rest farther back in the chair and reduce the arm opening.
 4
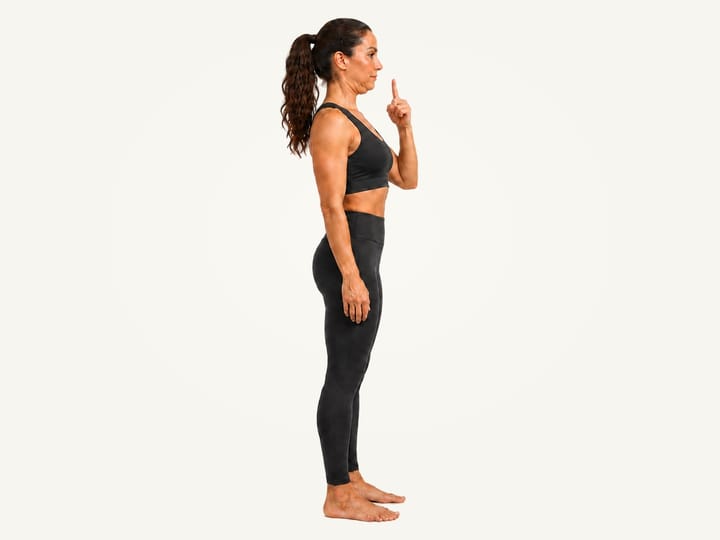
4Chin Tucks
30sDraw the chin straight back without tilting the head.
How to do it
- Stand tall with your feet comfortably apart and shoulders relaxed. Lightly touch one index finger to your chin without pressing.
- Hold your finger still and gently draw your chin straight back, leaving a small gap from the fingertip. Keep your eyes level and hold for 2–3 seconds without tilting your head.
- Relax back to a neutral head position and lower your hand. Repeat the same gentle chin glide for the prescribed time, or finish when you are ready, using your finger as a guide if helpful.
Why it matters
Practise drawing your head back with control while your shoulders stay relaxed.
How it should feel
A small glide of the head, with gentle work around the neck and possibly a light stretch at the back.
Make it easier or harder
- EasierSit with support. Rest against a chair and use a smaller chin glide.
When to stop
Stop if the movement is painful.
 5
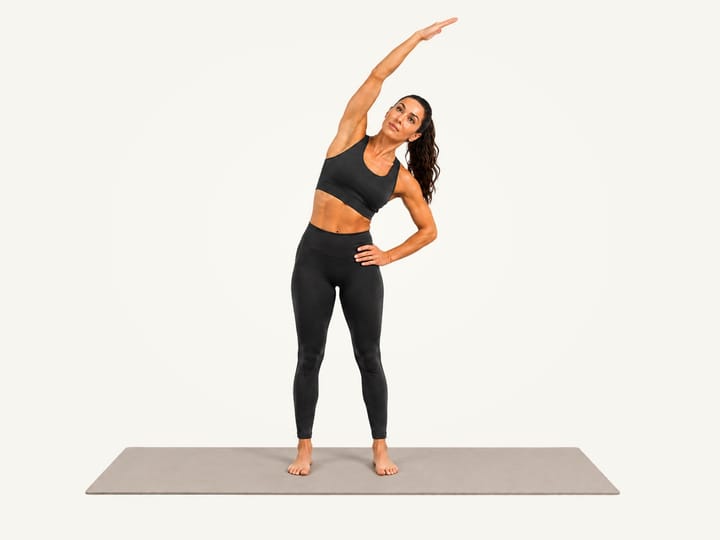
5Side Bend
45sReach one arm up and gently lean to the opposite side.
How to do it
- Stand tall with your feet hip-width apart and arms relaxed by your sides. Keep both feet flat and face forward.
- Raise the right arm overhead and rest the left hand on your hip. Lean gently left without twisting, with both feet grounded. Hold and breathe comfortably.
- Return upright and lower the arm before changing sides. Raise the left arm and lean gently right with the right hand on your hip. Return upright to finish.
Why it matters
Explore a side bend through the torso while keeping a steady standing base.
How it should feel
A mild stretch from the side of the hip through the ribs and shoulder.
Make it easier or harder
- EasierKeep the arm lower. Use a smaller side bend.
- HarderTry a crossed-foot stance. Cross the stretching-side foot behind only while both feet stay stable.
 6
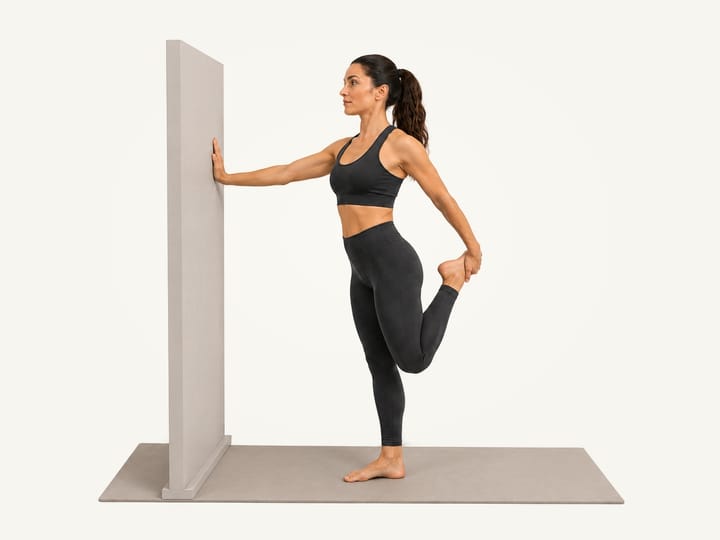
6Standing Quad Stretch
45sStand with support and gently bring one heel towards your bottom.
How to do it
- Stand tall with feet hip-width apart, facing a wall or sturdy support. Place your right hand on it for balance.
- Bend your left knee and hold your left foot or ankle with your left hand. Gently bring your heel toward your buttock, keeping your knees close and your tummy gently braced.
- At the switch-sides cue, gently release your left foot and place it on the floor. Place your left hand on the support, then bend your right knee and hold your right foot or ankle with your right hand. Keep your knees close and tummy gently braced. Hold comfortably for the remaining time, then lower the foot with control.
Why it matters
Stretch the front of the thigh while standing with support.
How it should feel
A gentle stretch along the front of the bent-leg thigh.
Make it easier or harder
- EasierExtend your reach. Use a towel or strap around the foot, with hand support.
When to stop
Stop if you feel knee or kneecap pain; do not force the knee bend.
 7
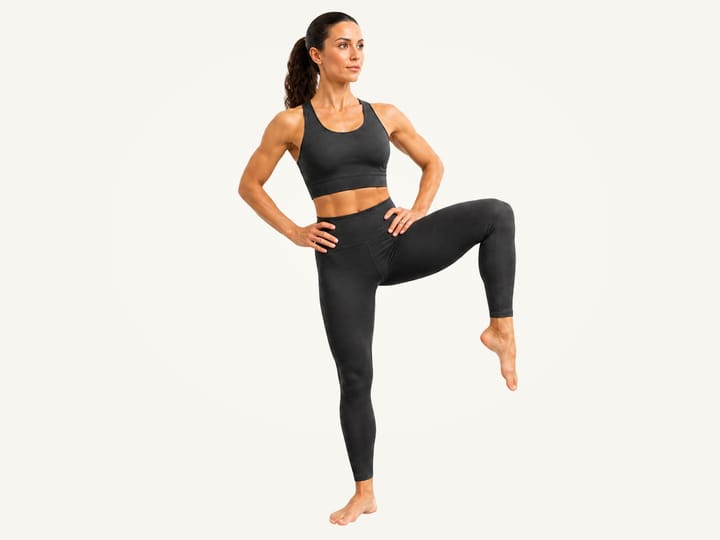
7Standing Hip Circles
45sLift one knee and trace a slow, controlled circle from the hip.
How to do it
- Stand tall with your hands on your hips and shift your weight onto your right foot. Use a wall or sturdy support if needed.
- Lift your left knee in front of you, keeping it bent and your torso upright. Raise it only as high as you can without rounding your back or hiking your pelvis.
- Slowly move your left knee out to the side from the hip. Keep your pelvis facing forward and your standing leg steady; make the circle smaller if you start to lean.
- Keeping the left knee bent, rotate the hip so the foot moves behind you, then guide the knee gently backward. Stay within a range that lets your back and pelvis remain steady.
- Bring your left leg back beneath you to complete the circle. Repeat slowly in the reverse direction, then change to your right leg when ready, or follow the routine’s side cue.
Why it matters
Explore several directions of hip movement with a slow bent-knee circle.
How it should feel
Controlled movement around the lifted hip, with the standing side keeping you steady.
Make it easier or harder
- EasierHold a stable support. Make a smaller circle at a comfortable knee height.
- HarderSlow the circle. Use the same range and less momentum.
 8
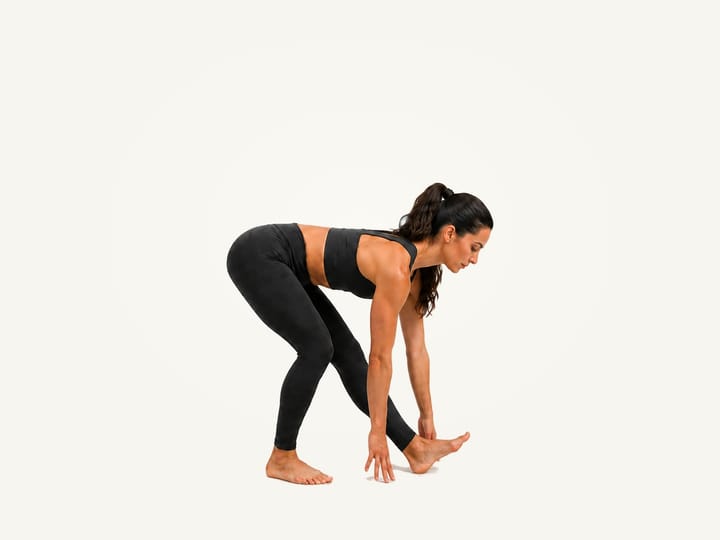
8Hamstring Scoops
30sStep one heel forward and scoop the hands toward the toes.
How to do it
- Place your left heel a short step forward with toes lifted. Keep the left leg mostly straight and soften your right knee, with your right foot flat. Let your hips sit slightly back as you prepare to scoop.
- Send your hips back and hinge forward with a long back. Sweep both hands down toward your left heel and past the toes in a comfortable scooping motion; keep your right foot flat and avoid forcing the reach.
- Bring your torso back upright as your hands sweep forward and up, then relax your arms and bring your left foot back beneath you.
- Place your right heel forward with toes lifted, soften your left knee and repeat the gentle hinge and scoop. Stand up between sides and continue alternating, stepping forward or resetting in place as space allows.
Why it matters
Explore a gentle hip hinge over a grounded heel while coordinating an arm sweep.
How it should feel
A mild stretch behind the front leg, with the supporting foot firmly planted.
Make it easier or harder
- EasierScoop higher. Use a smaller hip hinge and a higher hand sweep.
- HarderSlow the scoop. Keep the same comfortable reach with a smoother return.


Do this routine in the Prep app
Get Travel Recovery as a guided, timed session — with every move demonstrated and adjustable to how you feel.
Download on iOS