
Football · 4¾ min
Pre-Football Warm-Up Routine
Get match-ready with a dynamic football warm-up for your hips, groin, hamstrings and ankles. About five minutes to prepare for sprinting, turning and kicking.
Do this routine in the Prep app
Get Pre-Football Warm-Up as a guided, timed session — with every move demonstrated and adjustable to how you feel.
Download on iOS
 1
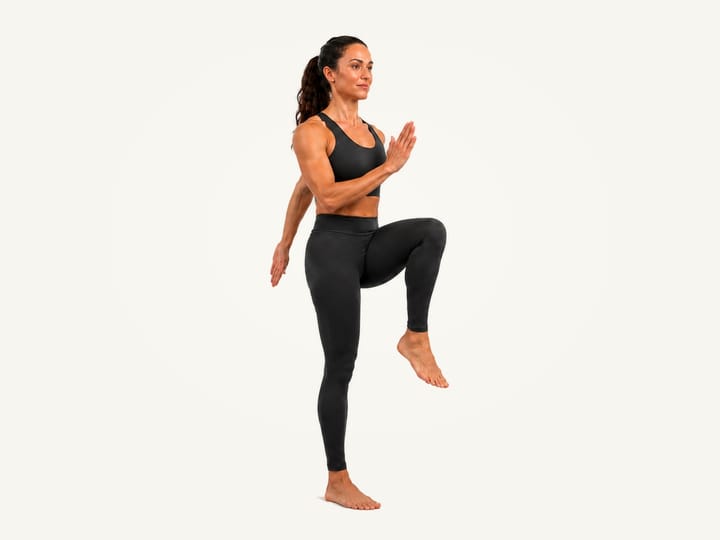
1High Knees
30sMarch or jog in place, lifting alternate knees to a comfortable height.
How to do it
- Stand tall with feet hip-width apart. Bend your elbows and keep your hands relaxed.
- Lift your left knee to a comfortable height, up to hip height, as your right arm swings forward. Keep your chest stacked over your hips and your right foot grounded.
- Lower your left foot, then lift your right knee as your left arm swings forward. Continue alternating. Start with a march and build to a light jog only if comfortable.
Why it matters
Practise alternating knee lifts with the opposite arm as part of an active warm-up.
How it should feel
A steady marching or light jogging rhythm, with the hips lifting each knee.
Make it easier or harder
- EasierMarch lower. Use slower steps and a comfortable knee height.
- HarderBuild to a light jog. Keep the same tall posture and relaxed arms.
 2
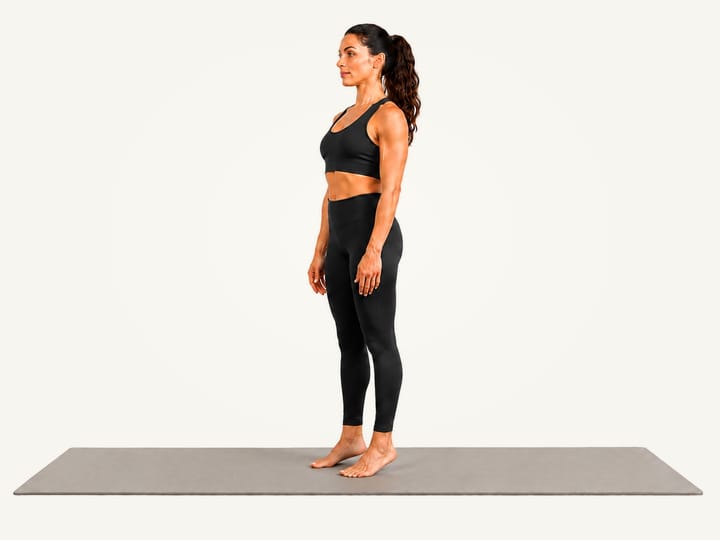
2Heel-to-Toe Rocks
30sRock smoothly from heels to toes to wake up the ankles and lower legs.
How to do it
- Stand tall with feet hip-width apart and both soles flat. Keep your knees soft and use a stable wall or secured chair if needed for balance.
- Slowly lift both heels a small amount while the balls of the feet and toes stay grounded. Keep your torso upright, then lower both heels fully to the mat.
- With both heels grounded, gently lift both forefeet and toes toward your shins. Lower your feet flat, then repeat the heel-to-toe sequence smoothly without bouncing or swaying.
Why it matters
Practise lifting the heels and forefeet in turn while keeping your trunk steady.
How it should feel
Alternating work through the calves and front of the shins as the feet move.
Make it easier or harder
- EasierMake the lifts smaller. Hold a wall or secured chair for balance.
- HarderSlow each lowering. Set the feet down gently between directions.
 3
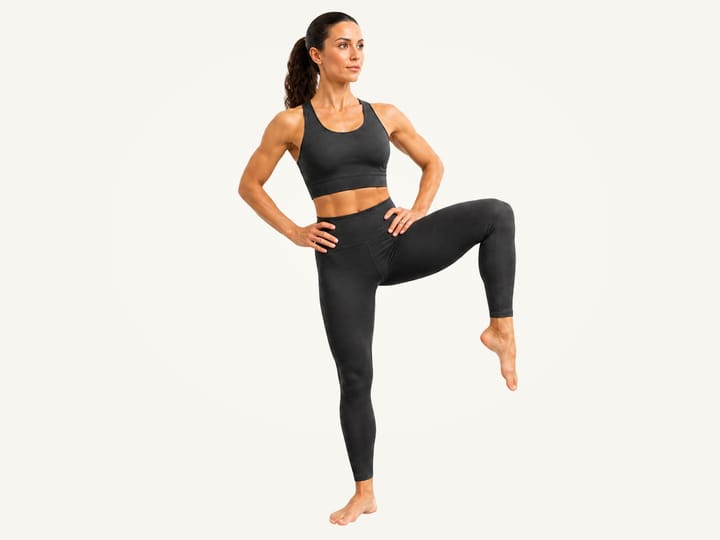
3Standing Hip Circles
45sLift one knee and trace a slow, controlled circle from the hip.
How to do it
- Stand tall with your hands on your hips and shift your weight onto your right foot. Use a wall or sturdy support if needed.
- Lift your left knee in front of you, keeping it bent and your torso upright. Raise it only as high as you can without rounding your back or hiking your pelvis.
- Slowly move your left knee out to the side from the hip. Keep your pelvis facing forward and your standing leg steady; make the circle smaller if you start to lean.
- Keeping the left knee bent, rotate the hip so the foot moves behind you, then guide the knee gently backward. Stay within a range that lets your back and pelvis remain steady.
- Bring your left leg back beneath you to complete the circle. Repeat slowly in the reverse direction, then change to your right leg when ready, or follow the routine’s side cue.
Why it matters
Explore several directions of hip movement with a slow bent-knee circle.
How it should feel
Controlled movement around the lifted hip, with the standing side keeping you steady.
Make it easier or harder
- EasierHold a stable support. Make a smaller circle at a comfortable knee height.
- HarderSlow the circle. Use the same range and less momentum.
 4
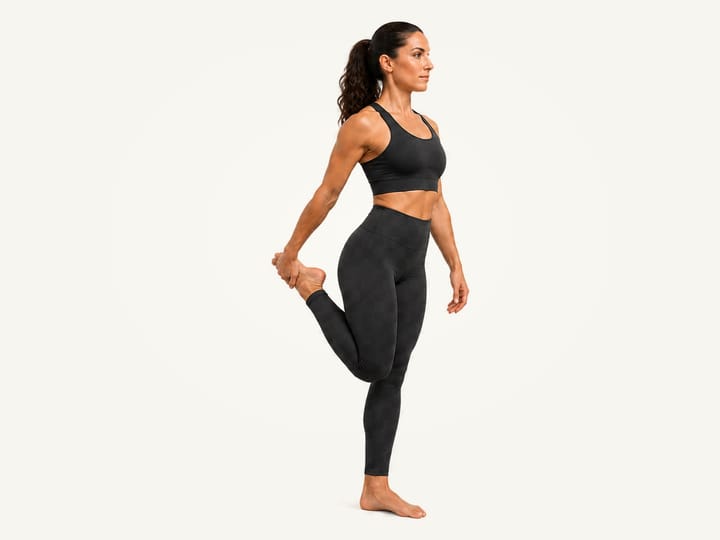
4Walking Quad Pull
30sWalk forward, pulling one heel toward the glute each step.
How to do it
- Stand tall with clear space ahead and shift onto your left foot. Bend your right knee and take a light hold of the right foot or ankle with your right hand. Bring the heel towards the buttock only as far as comfortable, keeping the torso upright and knees comfortably near each other.
- Release your right foot before placing it down. Step onto the right foot, then bend the left knee and lightly catch the left foot or ankle with your left hand. Release and step again, alternating gently for the remaining time. Finish with both feet down. Practise in place with support if balance is difficult.
Why it matters
Link a gentle front-thigh stretch with a controlled step onto the next leg.
How it should feel
A comfortable stretch through the front of the lifted thigh, with the standing leg keeping you balanced.
Make it easier or harder
- EasierStay beside support. Hold a wall and alternate the stretch without travelling.
- HarderPause while balanced. Stay upright briefly before releasing the foot.
When to stop
Stop if catching the foot causes sharp knee pain.
 5
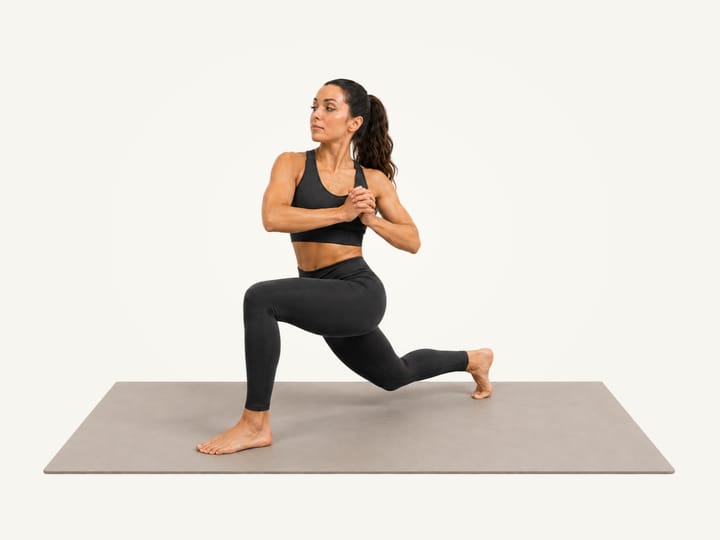
5Reverse Lunge with Rotation
30sStep back into a lunge, then rotate the torso over the front leg.
How to do it
- Stand tall with feet hip-width apart and hands clasped in front of your chest.
- Step your right foot back and bend both knees into a comfortable lunge. Keep your left foot flat, your right heel lifted and your back knee above the floor.
- Keep your legs steady and gently turn your chest and clasped hands toward your left side, over the front leg. Keep your torso tall and avoid forcing the turn.
- Turn back to centre, press through your left foot and bring the right foot forward to stand. Step the left foot back and turn toward your right front leg. Keep alternating slowly.
Why it matters
Combine a backward lunge with a controlled turn through the chest.
How it should feel
Work in the front thigh and buttock, with a comfortable turn through the trunk.
Make it easier or harder
- EasierUse a shallow lunge. Keep your hands close and make the turn smaller.
- HarderReach slightly farther. Move your clasped hands away only while balanced.
 6
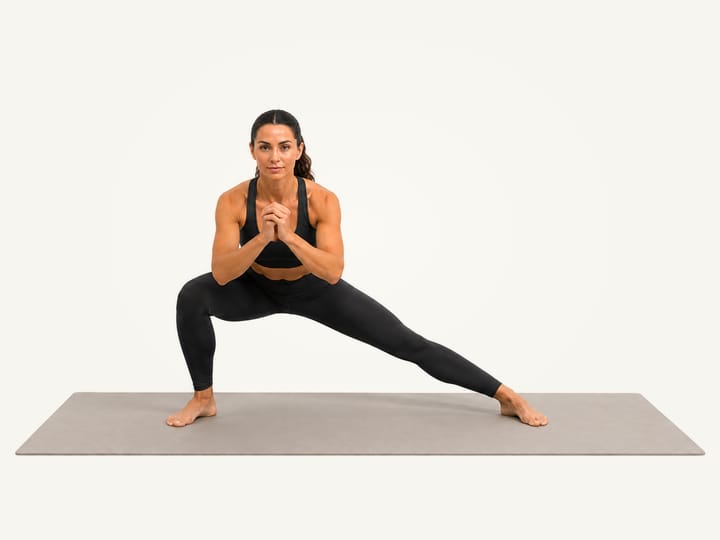
6Lateral Lunges
30sStep wide to one side and sit the hips back over that foot.
How to do it
- Stand tall with feet hip-width apart and pointing forward. Clasp your hands comfortably in front of your chest.
- Step your right foot to the side, plant it fully and bend the right knee as you send your hips back. Keep the left leg long, both heels down and the right knee aligned with the foot.
- Press through your right foot to return to standing. Step left and repeat on the other side. Continue alternating with control.
Why it matters
Practise loading one leg from a sideways step while the other leg stays long.
How it should feel
Work in the bent leg and hip, with a gentle stretch along the inner thigh of the long leg.
Make it easier or harder
- EasierShorten the step. Use a shallower lunge and a stable support if needed.
- HarderPause at the side. Stay steady briefly before pressing back to stand.
When to stop
Stop if this causes groin or knee pain; do not force a wider step or deeper lunge.
 7
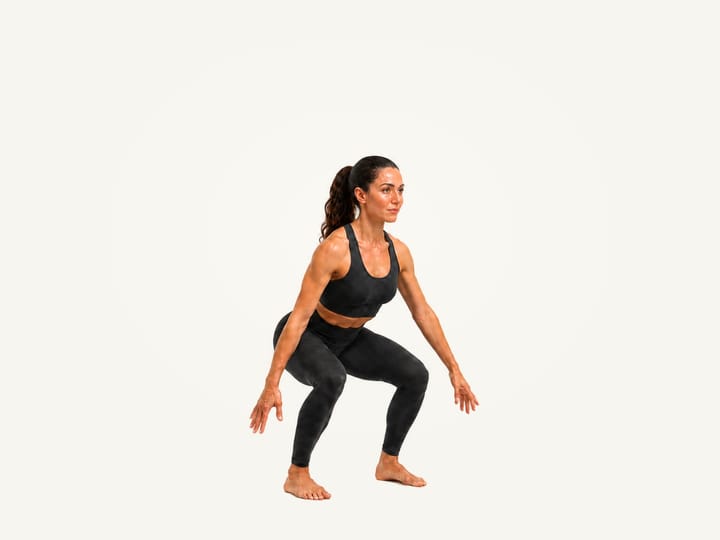
7Snap-Down to Stick
30sMove from tall standing into a shallow, steady squat position.
How to do it
- Stand with feet comfortably apart and lift both arms overhead. Keep your heels on the floor and your trunk upright.
- Sweep your arms down as you move briskly into a shallow squat with your hips back. Let both feet share your weight, keep your chest lifted and let your knees follow your toes; no jump is needed. Hold still for about two seconds, then stand and reset.
Why it matters
Practises the controlled stopping position used in jump-and-land drills.
How it should feel
Balanced pressure through both feet with your thighs and hips controlling the stop.
Make it easier or harder
- EasierLower more slowly. Start with both heels down and find the position.
- HarderStart on tiptoes. Snap down a little faster with the same control.
When to stop
Stop for sharp knee, ankle, Achilles or back pain, or if you cannot control the landing.
 8
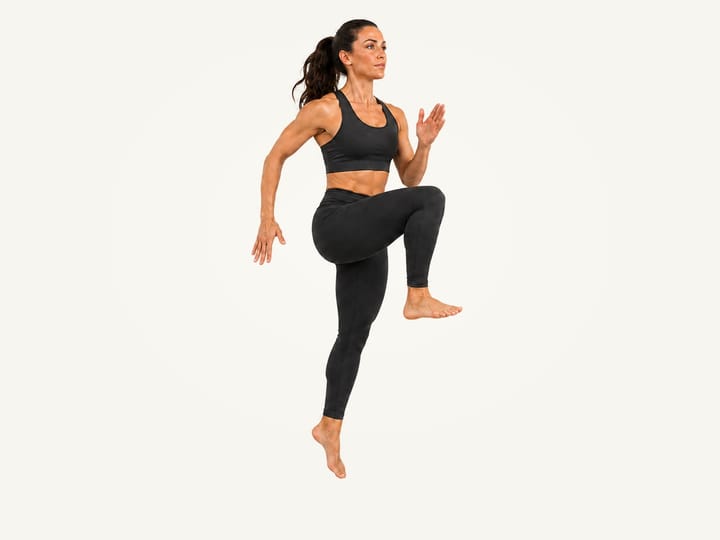
8A-Skips
30sTravel forward with small skips and alternating knee lifts.
How to do it
- Stand tall with feet hip-width apart in a clear lane. Start a slow forward march, matching each lifted knee with the opposite arm.
- As your right knee rises, make a small hop on your left foot. Keep your trunk tall, bring the left arm forward and draw the lifted toes towards the shin. Land lightly beneath your body.
- Step onto the right foot, then lift the left knee and make a small hop on the right as the right arm moves forward. Keep alternating small travelling steps and hops for the remaining time. Return to marching whenever the rhythm becomes unclear.
Why it matters
Practise a light skip with alternating knee drive and opposite-arm timing.
How it should feel
A springy rhythm under the feet, with a brief balance as each knee rises.
Make it easier or harder
- EasierMarch the pattern. Walk with alternate knee lifts before adding a skip.
- HarderMake the rhythm quicker. Increase pace only while the contacts stay controlled.
 9
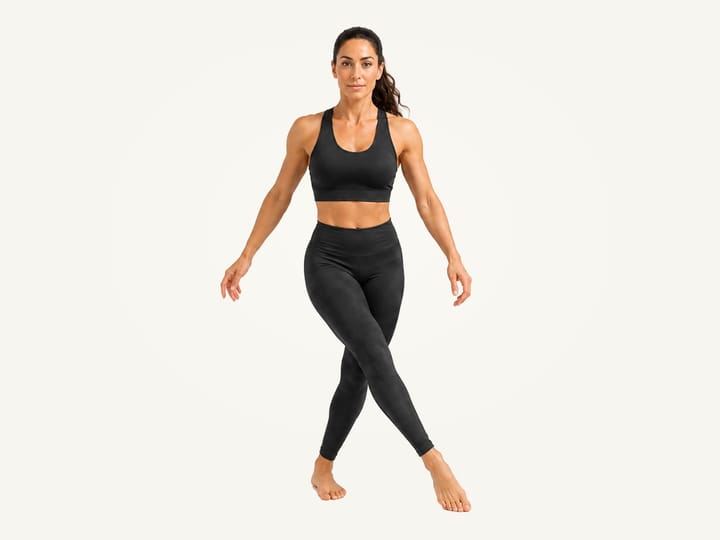
9Carioca (Grapevine)
30sMove sideways with the trailing foot crossing front then back.
How to do it
- Stand with feet hip-width apart and your chest facing forward, with clear, level space to your left. Keep your knees soft.
- Step your right foot across the front of the left in a small, deliberate step. Let your hips turn comfortably while your chest stays generally forward.
- Step the left foot out to your left to uncross your legs. Stay tall and keep the feet clear of each other.
- Step the right foot behind the left, then step the left foot out again. Repeat slowly for the remaining time. To travel back to your right, keep facing forward and let the left foot cross in front and behind instead.
Why it matters
Practise sideways travel with alternating front and back cross-steps.
How it should feel
A changing rhythm through the feet and hips while the upper body stays relatively quiet.
Make it easier or harder
- EasierUse front crosses. Step across in front, then step out; build the full pattern gradually.
- HarderIncrease pace gently. Keep the same clear foot placement.


Do this routine in the Prep app
Get Pre-Football Warm-Up as a guided, timed session — with every move demonstrated and adjustable to how you feel.
Download on iOS