
Figure 4 stretch
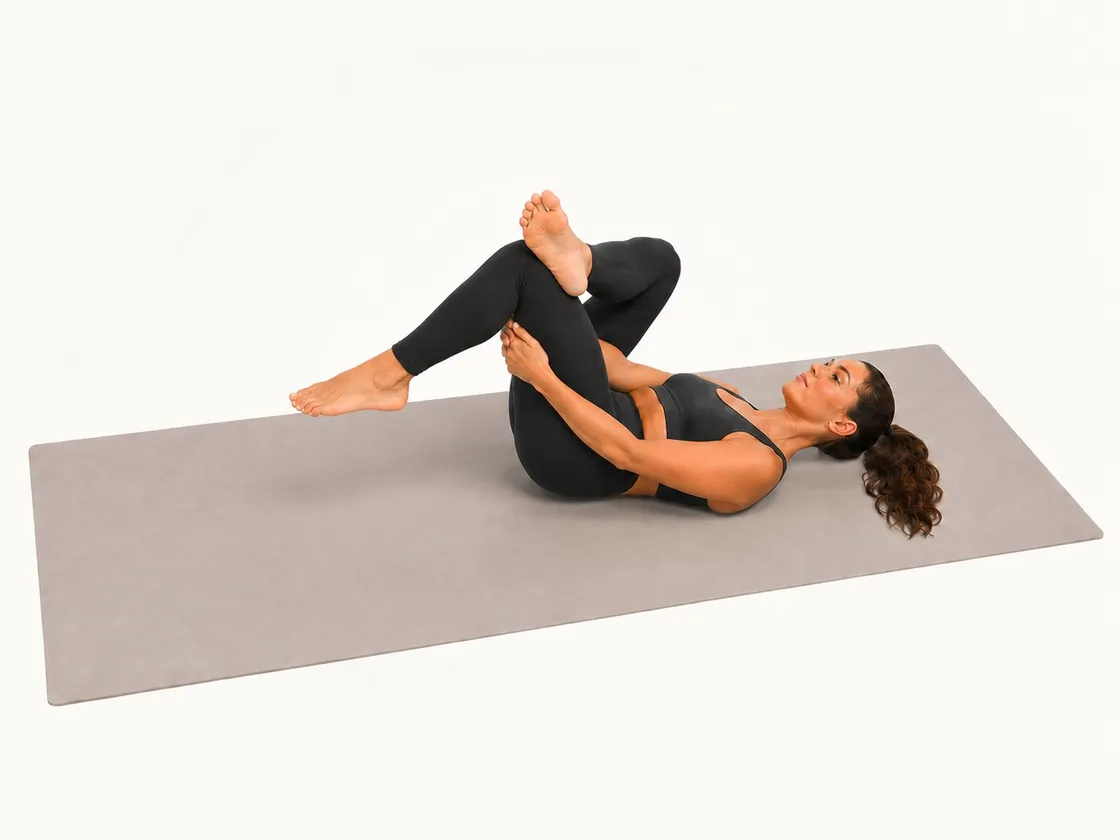
The figure 4 stretch is a lying stretch for the glutes and outer hip. You cross one ankle over the opposite thigh and gently draw that thigh towards you, with the floor supporting your back. Use it after training or before bed.
Also called the figure four or figure of four stretch, the supine figure four, or reclined pigeon.
- Works
- Glutes and outer hip
- Hold
- About 30 sec each side
- Kit
- None
- Intensity
- 2 of 5 on Prep's scale
How to do it
How to do the figure 4 stretch.
Hold about 30 seconds each side. If drawing the thigh in is too much, stay at step 2 with the foot on the floor.
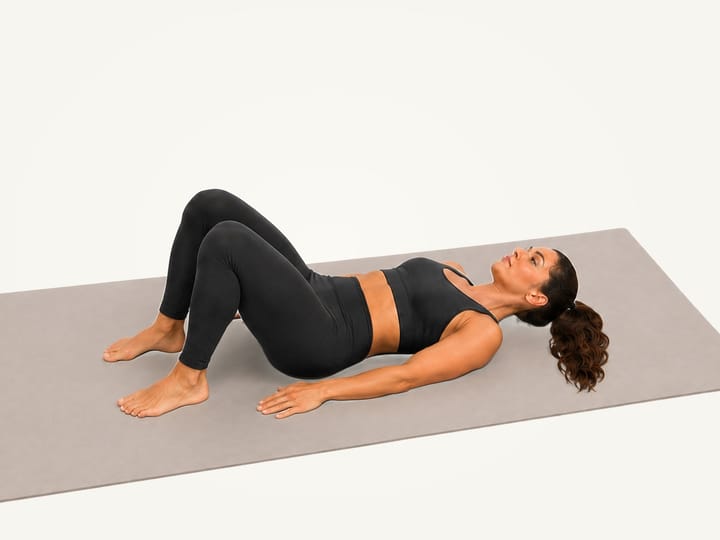
Step 1
Set up
Lie on your back with both knees bent and feet flat. Rest your head, shoulders and pelvis on the mat.
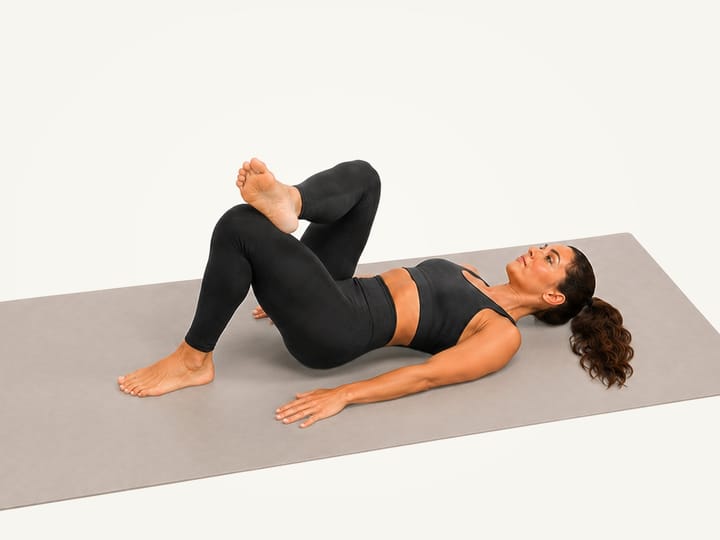
Step 2
Cross the ankle
Rest your right ankle on your left thigh, just above the knee. Flex the right foot and let the right knee open comfortably.
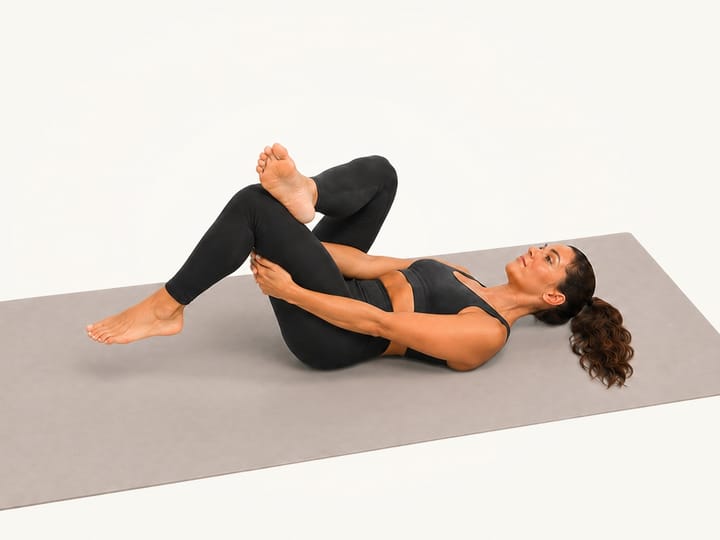
Step 3
Reach behind the thigh
Lift your left foot slightly. Reach your right arm through the opening between your legs and your left arm around the outside. Join your hands behind the left thigh.
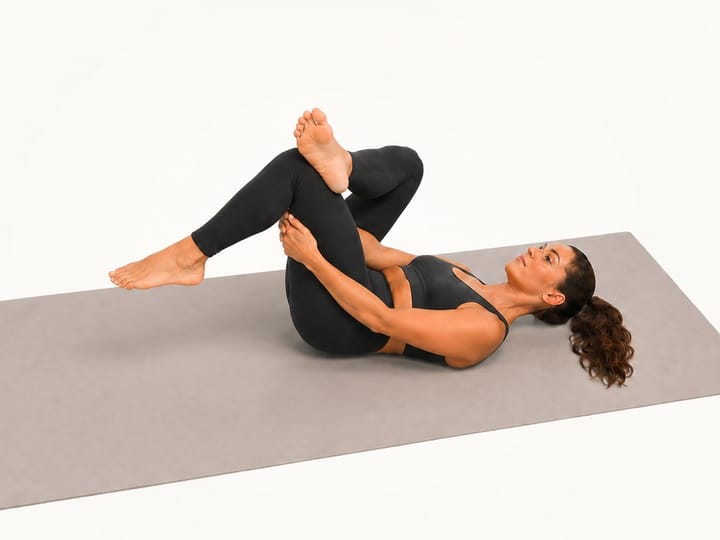
Step 4
Draw in and hold
Keep the same grip and gently draw the left thigh closer until you feel a comfortable stretch in the right glute. Keep your head and shoulders down. Release and lower the left foot before uncrossing and repeating on the other side.


Form
Figure 4 stretch form.
A comfortable stretch through the outer hip and glute of the crossed leg.
Keep
- Rest the ankle on the thighKeep it clear of the kneecap.
- Keep your head downLet the floor support your head and shoulders.
- Draw in with a level pelvisAdjust the pull without twisting.
Common mistakes
- Forcing the crossed knee downLet the knee open only as far as comfortable.
- Pulling until your back liftsEase the thigh away to regain support.
- Easier version
- Leave the foot groundedHold the crossed-leg position without pulling the thigh in.
- Harder version
- Draw the thigh closerUse a small increase while the pelvis stays level.
- Who should skip it
- Skip during an acute back flare-up with leg symptoms, or if you have new numbness or tingling.
- When to stop
- Stop for back pain, knee or hip pain, pins and needles, or symptoms travelling down the leg.Seek clinical advice for pain travelling below the knee, new weakness in the leg or foot, loss of feeling or pins and needles.
Questions
Figure 4 stretch questions.
What does the figure 4 stretch work?
The figure 4 stretch works the glutes and outer hips.
What is the figure 4 stretch good for?
Prep uses the figure 4 stretch for outer-hip mobility, after training or before bed.
How long should you hold the figure 4 stretch?
Hold about 30 seconds each side. If drawing the thigh in is too much, stay at step 2 with the foot on the floor.
How do you make the figure 4 stretch easier?
Leave the foot grounded. Hold the crossed-leg position without pulling the thigh in.
Who should skip the figure 4 stretch?
Skip during an acute back flare-up with leg symptoms, or if you have new numbness or tingling.
Alternatives
Figure 4 stretch alternatives.
Similar moves


In these routines


More hip exercises


Do it timed, both sides.
Prep times both sides, shows the demo clip and plans your week around the areas you choose.