
Pigeon pose
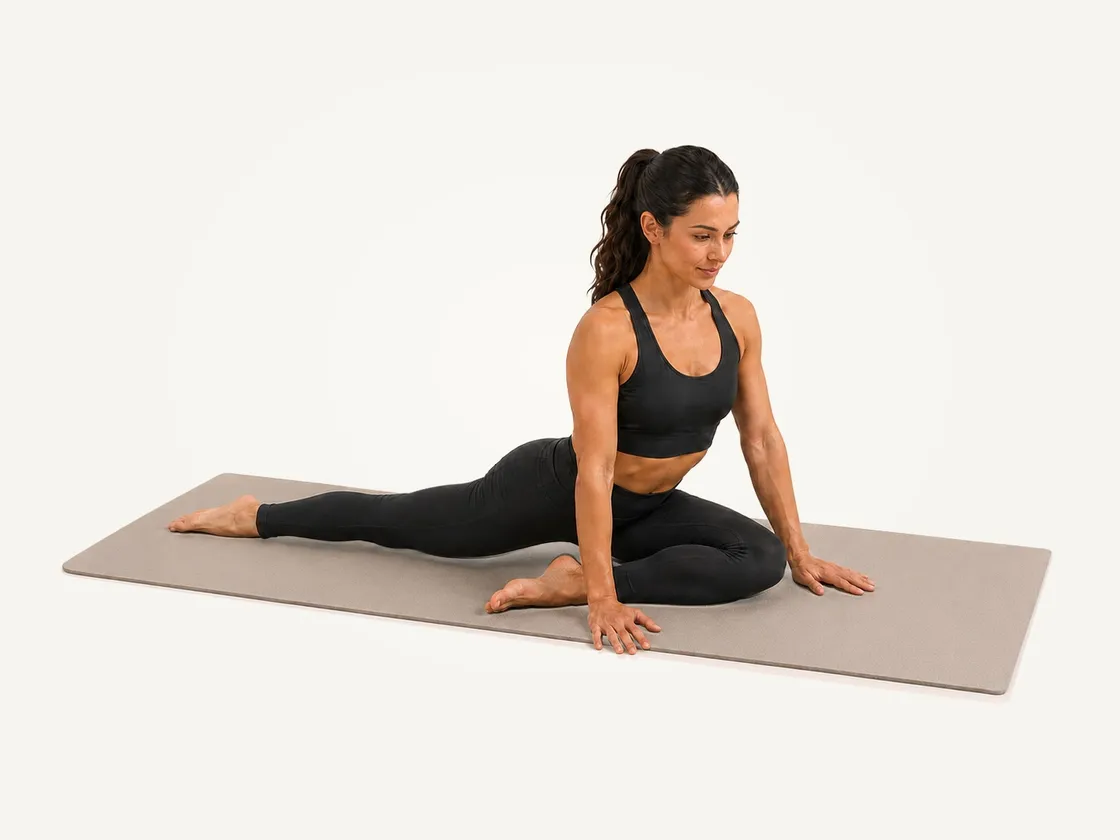
Pigeon pose is a floor stretch for the glutes and outer hip. One shin rests diagonally across the mat while the other leg extends behind you. Use it after training or in a recovery session.
Also called the pigeon stretch.
- Works
- Glutes and outer hip; also front of the rear hip
- Hold
- About 30 sec each side
- Kit
- None. A towel or block helps
- Intensity
- 3 of 5 on Prep's scale
How to do it
How to do pigeon pose.
Hold about 30 seconds each side. Step 4 is optional: stay on your hands if folding forward is uncomfortable.
Step 1
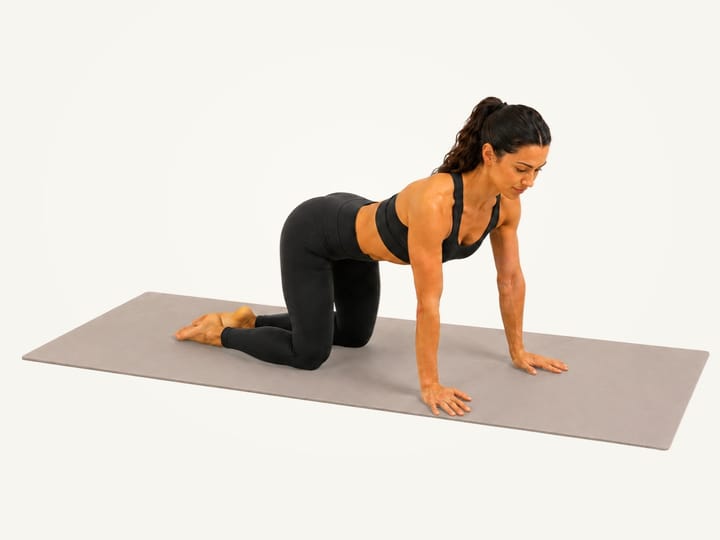
Start on all fours
Start on all fours with your hands below your shoulders and your knees below your hips.
Step 2
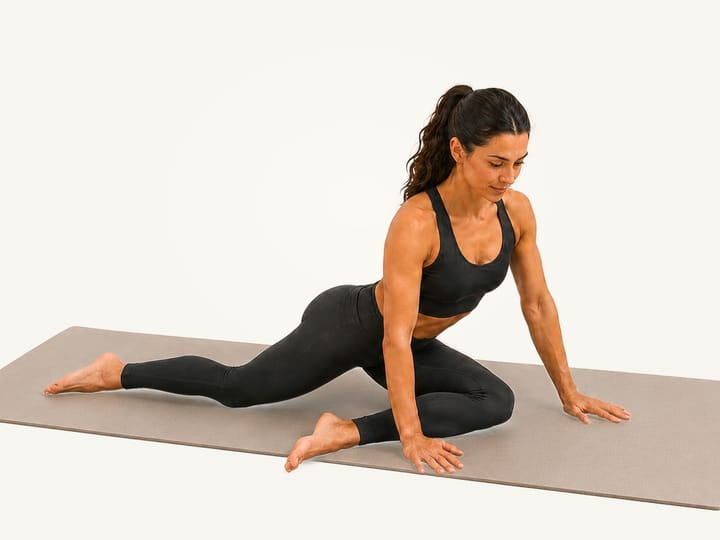
Bring the knee forward
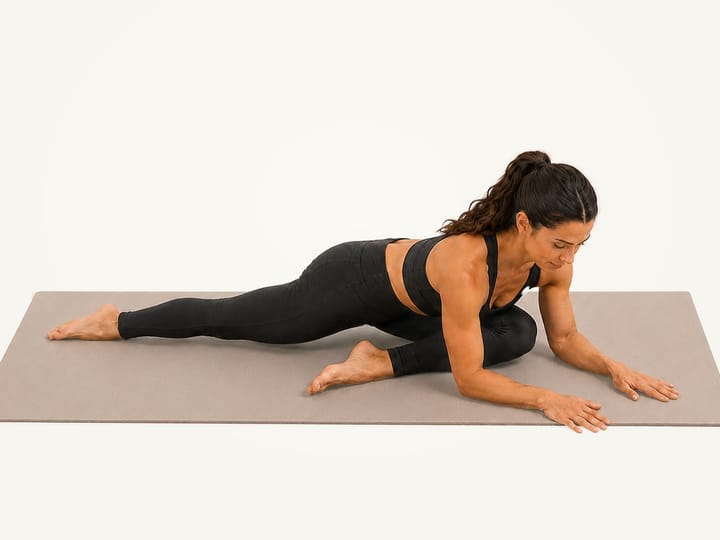
Keep your hands planted. Bring your right knee towards your right wrist and lay the shin diagonally across the mat, with the heel nearer your left hip. Do not force a parallel shin.
Step 3
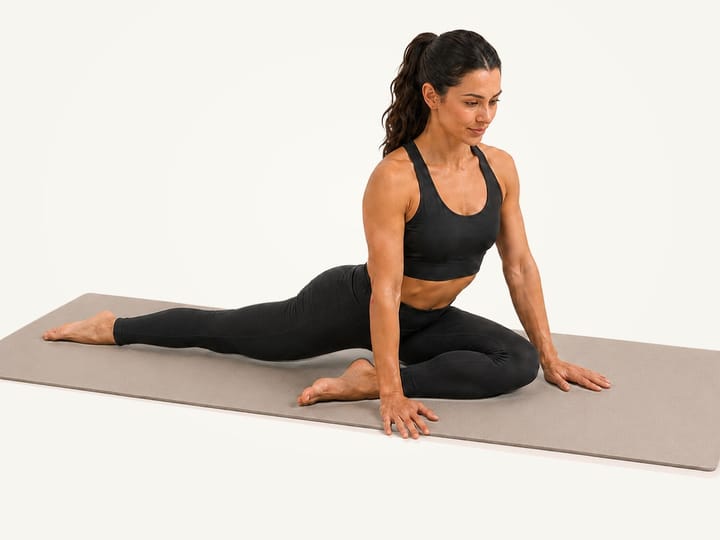
Lengthen and align
Slide your left leg straight back with the top of the foot down. Keep your torso long on both hands, orient both hip points forward as comfortably as possible, and support the right hip with a folded towel or block if needed.
Step 4
Fold if comfortable
Walk the hands forwards and lower towards the forearms only if the right knee stays comfortable and the pelvis remains supported. Hold gently, then return to all fours and repeat on the other side.


Form
Pigeon pose form.
A broad outer-hip and glute stretch in the front leg, with possible stretch at the front of the rear hip.
Keep
- Keep the shin diagonalBring the front heel nearer your pelvis.
- Support the front hipUse a towel or block if it sits above the mat.
- Keep the knee comfortableStay on your hands to control the depth.
Common mistakes
- Forcing a parallel shin
- Rolling onto the front hipReduce the fold and restore support.
- Easier version
- Stay upright and supportedBring the heel in and pad beneath the front hip.
- Try instead
- Figure 4 stretchAn outer-hip stretch with your back on the floor.
- Who should skip it
- Skip after a recent hip, knee, pelvic or lower-back injury, or after joint replacement, unless a clinician has cleared it.
- When to stop
- Stop for front-knee pain, groin pinching, numbness, tingling or symptoms travelling down the leg.
Questions
Pigeon pose questions.
What does pigeon pose stretch?
Pigeon pose stretches the glutes and outer hips, and also the front of the rear hip.
What is pigeon pose good for?
Prep uses pigeon pose for hip mobility, after training or during a recovery session.
How long should you hold pigeon pose?
Hold about 30 seconds each side. Step 4 is optional: stay on your hands if folding forward is uncomfortable.
How do you make pigeon pose easier?
Stay upright and supported. Bring the heel in and pad beneath the front hip. Or try the figure 4 stretch: an outer-hip stretch with your back on the floor.
Who should skip pigeon pose?
Skip after a recent hip, knee, pelvic or lower-back injury, or after joint replacement, unless a clinician has cleared it.
Alternatives
Pigeon pose alternatives.
Similar moves


In this routine

More hip exercises


Do it timed, both sides.
Prep times both sides, shows the demo clip and plans your week around the areas you choose.